
We’ll walk you through how to run Apache Airflow locally in Docker. The first chunk of this post will cover how to get Airflow standing, the second will go into some nuance and will answer several whys.
My Setup
- MacOS Ventura
Getting Airflow Standing
Docker
- 1. Download Docker Desktop from this link. Make sure to check which chip your machine has before downloading your software. Go ahead and get it installed. We won’t cover the details here.
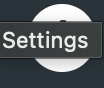
- 2. You will most likely need to let Docker use more memory than it’s setup to use out of the box. Click settings in the top right of Docker Desktop.
- 3. Click resources at your left in Docker Desktop.

- 4. Now drag the memory slider over to 4 to 8 gbs which is what’s recommended in the Airflow docs.

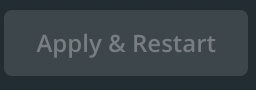
- 5. Click `Apply & restart` on the bottom right. This should apply your settings changes.
Airflow
- 1. Make a directory for your local environment. Execute the following:
mkdir local_env && cs local_env
- 2. Now we’re going to need the docker-compose.yaml file. Execute the following to clone the file locally.
curl -LfO 'https://airflow.apache.org/docs/apache-airflow/2.5.0/docker-compose.yaml'
- 3. Let’s scaffold out what our file tree will look like. Execute the following to make all the dirs you need
mkdir -p ./dags ./logs ./plugins
echo -e "AIRFLOW_UID=$(id -u)" > .env
- 4. Now let’s initialize the database. Execute the following docker command:
docker compose up airflow-init
- 5. It should be couple minutes before the command above finishes. Once it wraps up please execute the following to get airflow running at https://localhost:8080
docker-compose up
- 6. Click the local host link I mentioned above. Your local environment should be good to go. Throw a DAG into your dags folder to get developing. More of a pip person? Check out this article for going the pip route.
Looking for more detailed info? Check out Airflow’s official docs.
Happy coding!